A small package from Singapore appeared in our mailbox this week — and that could only mean one thing, it was time to build another watch.
After building my first watch I had so much fun that I almost immediately began to plan for what my next build would be. This time, though, I wanted to go with a smaller-diameter watch.
The first watch I built was based on the Seiko SKX007, with its 42mm case that’s a bit big on the spectrum of my ideal watch size. I prefer somewhere in the 39mm to 41mm range, as my wrist is not particularly large.
Luckily for me, after doing a bit of poking around on the internet, I learned that the world of Seiko-based watch parts recently expanded to the SKX013 which is essentially the little brother to the SKX007, its case coming in at a demure 38mm. This was perfect, and an added benefit was that the two watches shared the same movement, dial and hand sizes which greatly expanded the possibilities of what I could put together. It was time to pick the parts!
The Part Picking Process
I had decided on an SKX013 based build so I had to figure out which case I wanted to start with, would this be another diver style, or maybe an explorer or aviation style?
I first decided that I wanted the crown at 3 o’clock and wanted a bezel. This led me to a case from Lucius Atelier. Even better, this case came with the gaskets and case back included which ensured a perfect fit. The case back was a sapphire crystal exhibition style which allows you to see the movement.
Once the case was picked, I had to decide on the look of the watch. My initial thought was to do an homage to the Tudor Black Bay 58. I found the right Bezel Insert on namokiMODS, but couldn’t find a dial that fit that type of watch. This led me to back to Lucius Atelier to browse their dial options.
It was there that I saw a beautiful textured white dial that immediately caught my eye.
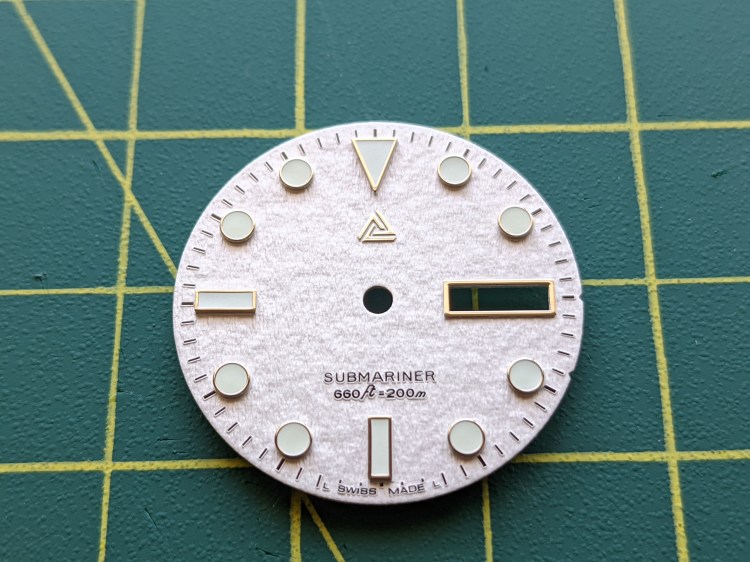
Upon seeing this, I scrapped my Black Bay idea and decided to make an original design based on the white dial from Lucius Atelier and go with a Day/Date complication.
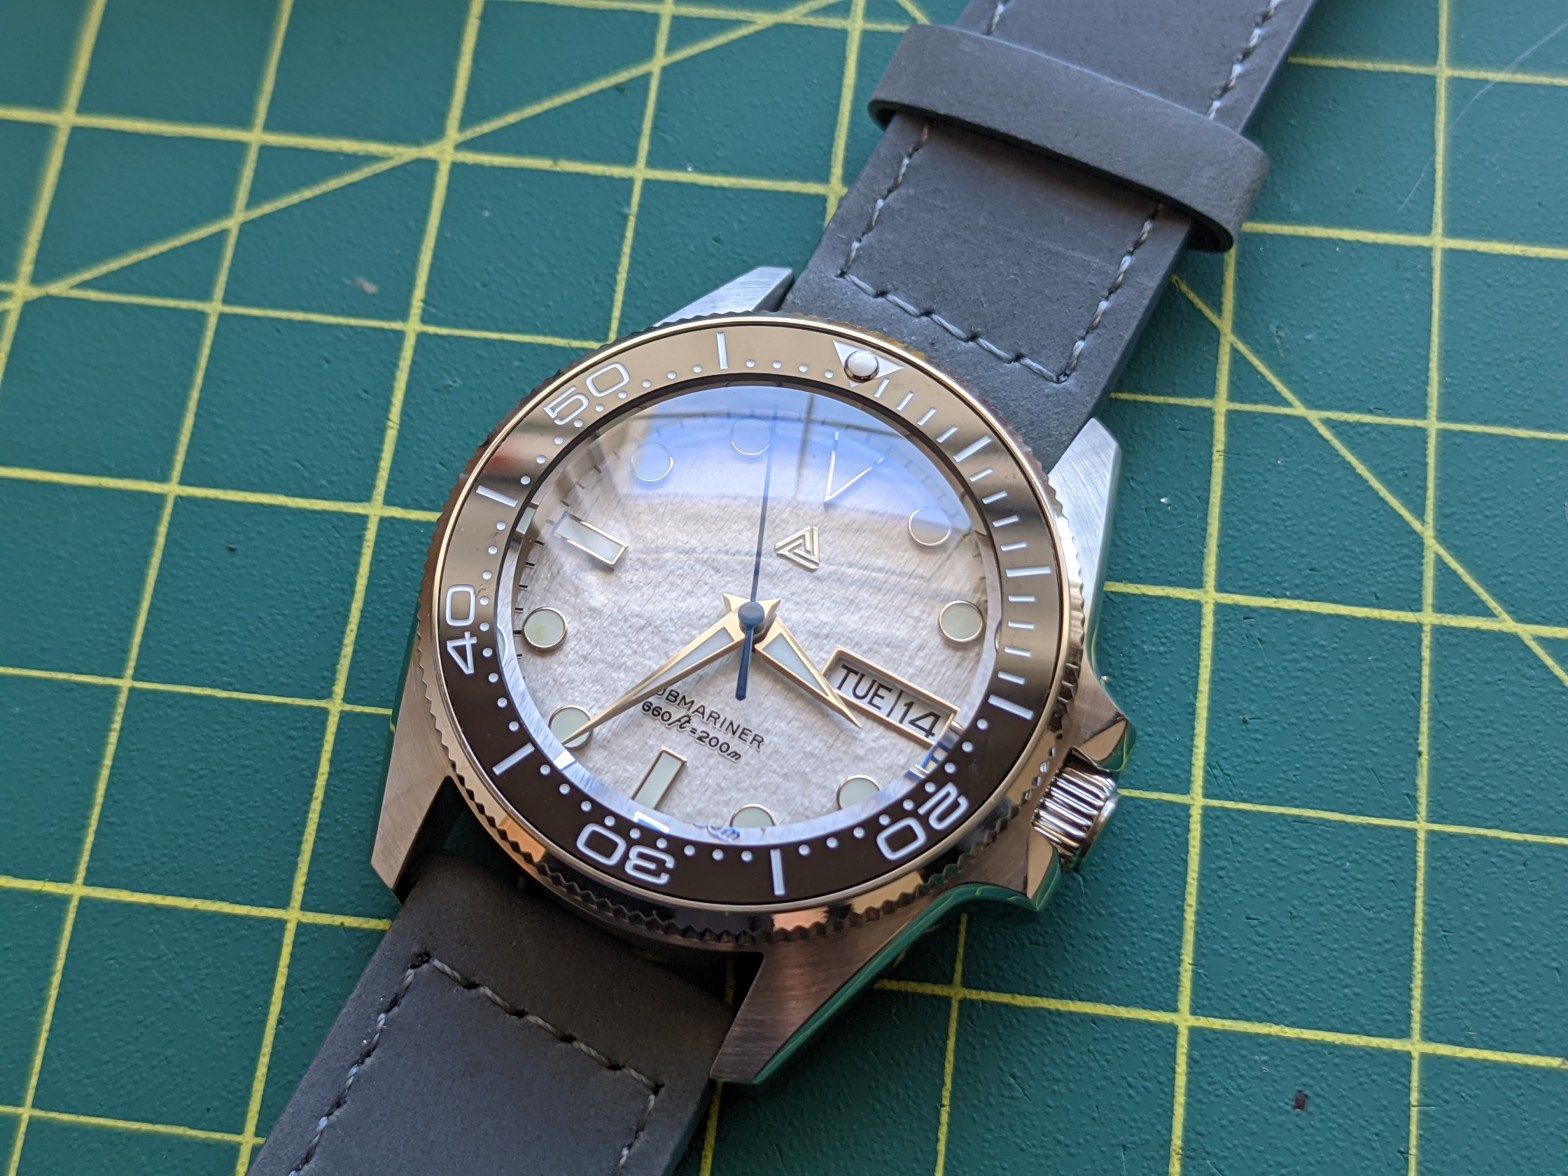
I love the look of black bezel with a white face, so I chose a black ceramic Seamaster-type dive bezel from namokiMODS with a coin edge bezel.
For the hands, I decided to stick with Lucius Atelier as I wanted glow-in-the-dark hands to match the dial, which had BGW9 Lume, which is a high-grade phosphorescent pigment. I chose Grand Seiko style hands with the same type of lume paired with a blue seconds hand as I wanted to keep the watch on the cooler side of the color spectrum. In a nice bit of personalization, Lucius Atelier includes hand written notes in their orders.

For this watch, I wanted to go with a leather strap over a bracelet. I have previously purchased some very high-quality straps from Strap Mill Canada, a Canadian based strap manufacturer of primarily NATO style straps and leather straps. I decided to go with an ash blue Crazy Horse leather strap that would pair well with the blue second hand.
With all that decided and ordered all that was left was to wait for everything to arrive.
Part List
- SKX013 Dive Watch Case from Lucius Atelier
- Submariner Dial – Snowflake Edition (Day/Date) from Lucius Atelier
- SKX013 Brushed Silver Chapter Ring from Lucius Atelier
- Grand Seiko Dauphine Hands from Lucius Atelier
- NH36A Movement from Lucius Atelier
- SKX013 Coin Edge Bezel from Namokimods
- SKX013 Ceramic Bezel Insert SMP Style from Namokimods
- SKX013 Double domed Sapphire Crystal from Namokimods
- Ash Blue Crazy Horse Leather Strap from Strap Mill Canada
The Build
Finally, all the parts arrived, and it was time to get to building. As this was the second watch build, it went quicker and smoother than the first one despite a few issues that cropped up.
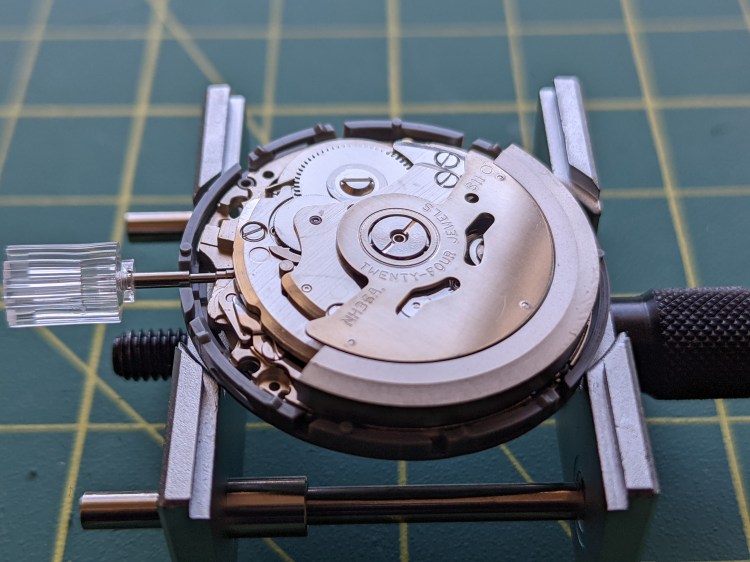
First step was to get the movement out and secured to the movement holder to be worked on. I function checked the movement to ensure the day and date were changing properly which they were.
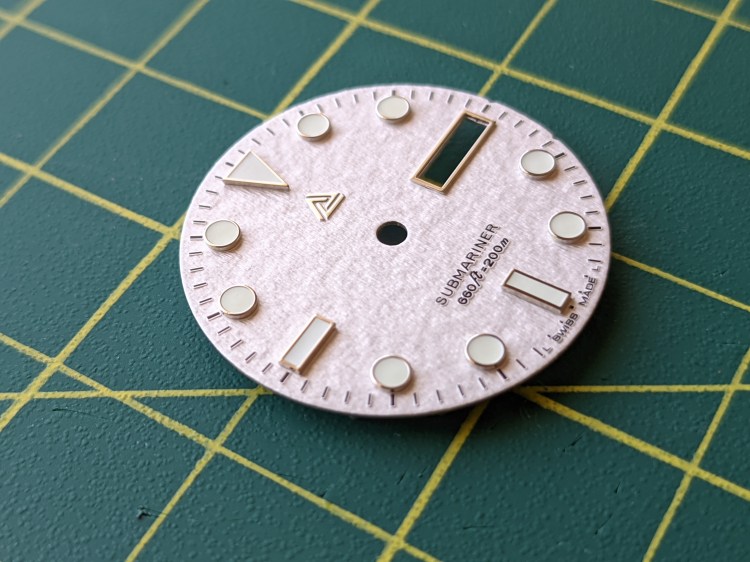
Next up was getting the watch dial out and cleaned up. I removed any dust and smudges and then clipped the feet on the back to ensure a proper fit with the 3 o’clock movement.
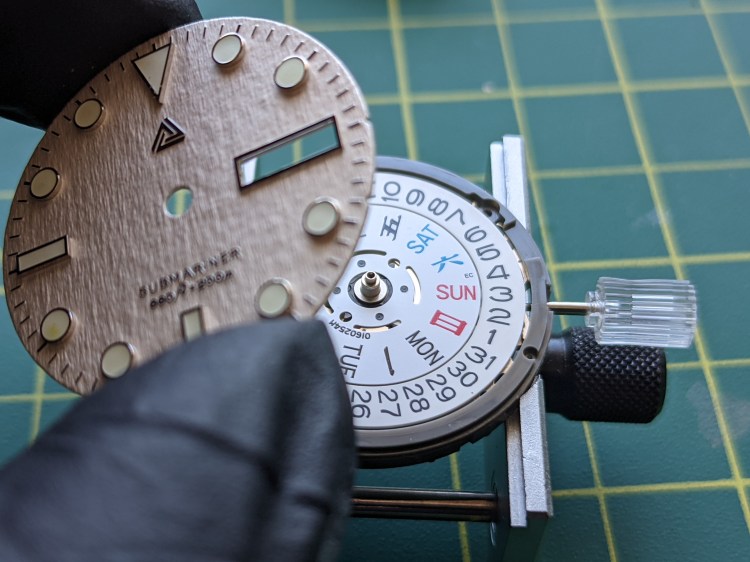
I filed the area on the back of the dial where I had clipped the extra feet and secured it to the movement. I again function checked the dial and had a bit of a brain fart. I pulled the crown out to the 1st position which allows day/date change to make sure the wheels still moved. I had already checked this prior to the dial going on so I knew it had been working. I was able to change the date no problem, but the day would not move when I moved the crown to position 2, it would just rotate the hand pinion. After removing the dial and looking at the movement, I realized I was an idiot and that I just needed to rotate the crown in the opposite direction in the 1st position. With that crisis averted the dial went back on and I was ready for the hands.
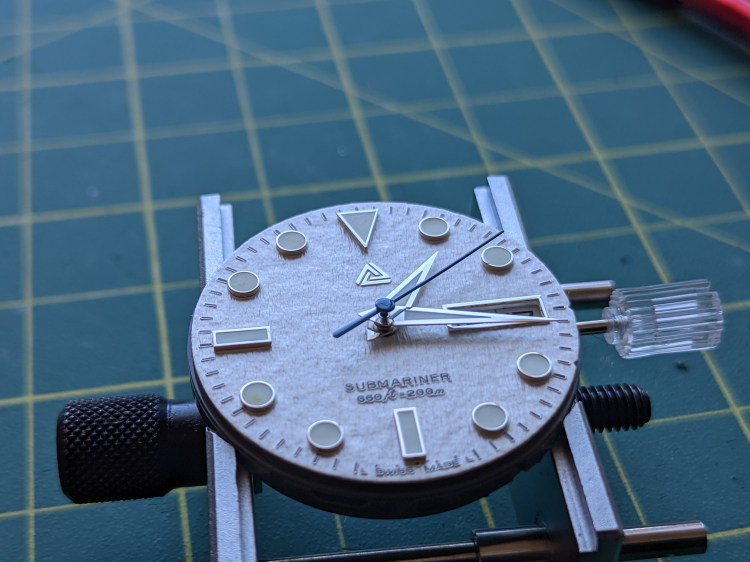
I rotated the crown until the date just changed to indicate midnight and got my hands ready. I was able to get the hour hand on very quickly by picking it up with the Rodico putty and carefully aligning it at 12. This time, I was able to get it near perfectly aligned on the first try which was a vast improvement over the previous watch build. Next up was the minute hand, which again went on without difficulty. I suspect that this style of hands may be easier to align than the Mercedes hands on the previous build as they are slightly larger.
Next up was the small blue seconds hand. The seconds hand is definitely the most challenging, but this time it went on in a few minutes after carefully aligning it (or so I thought). The hands were now on and working properly.
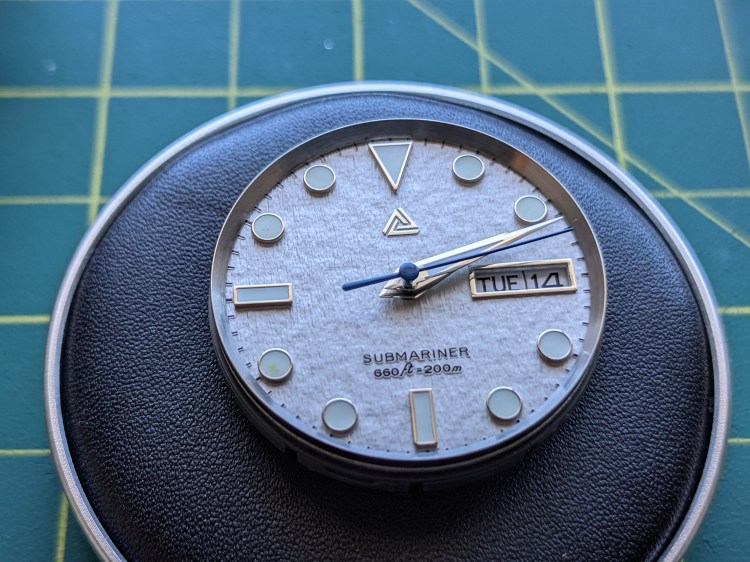
With the SKX013-type watch, the chapter ring is installed a little bit differently than how it worked on the previous build. With the other watch, I dropped the chapter ring in the case and it had an alignment tooth. For this watch, the ring needed to be put on top of the dial loosely and then the entire unit (movement, dial, chapter ring) would be put into the case by dropping the case on top of it then flipping and seating the movement snugly.

It was now time for crown and stem adjustment. As with the previous build, the included crown stem is too long for the case and requires trimming. I measured with calipers and removed the stem from the case and trimmed it a bit under the measurement. I did this a few times but on the 3rd trim, when I flipped the case I noticed the second hand had fallen off. I had apparently not quite seated it all the way. I was able to put it back on without any difficulties and pressed a little more firmly which ensured a good fit. After that, the stem was properly fitted and was able to screw down onto the case.
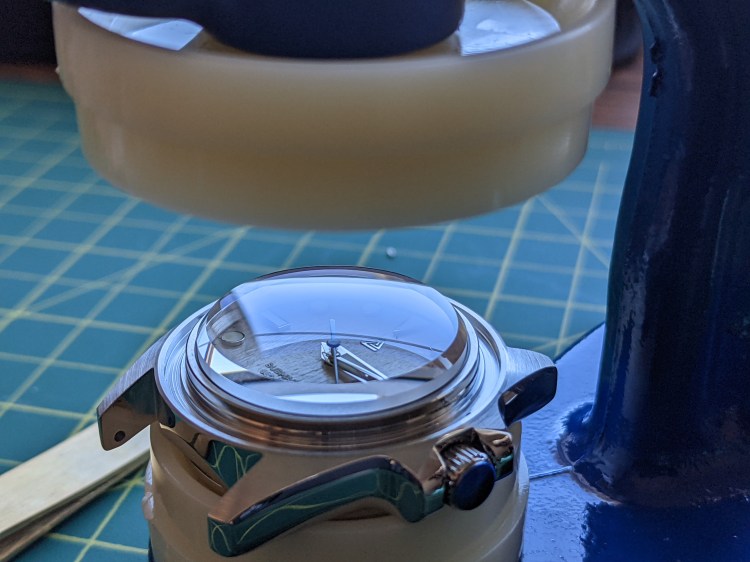
It was now time for the sapphire crystal. I screwed on the case back and tightened it with the case back tool. This time, I went with a larger die on the crystal press as the more exact size didn’t exert even pressure for getting the crystal down evenly and avoiding a pinched gasket. This worked much better, and the crystal went down without issue.
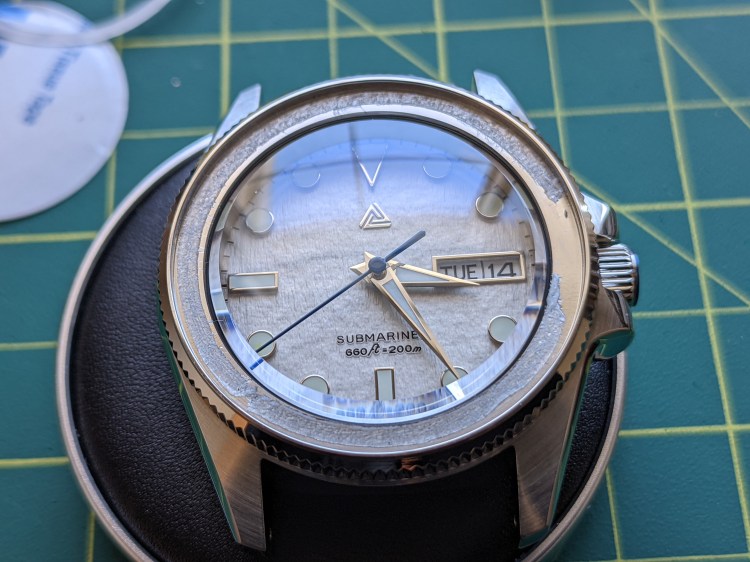
I then put the bezel on the watch with the crystal press and put the bezel insert in aligning the 0 marker with 12.

And the watch is built and complete! Now I just had to put on the leather strap which is a much simpler process than a bracelet as no resizing is necessary.

The leather strap was a very nice blue colour that matched quite well with the watch design in my opinion. I took the spring bars and put them in the strap and then attached them to the case with a spring bar tool.

The dial and hands of this watch has one of the more impressive types of lume and it is very bright after being charged in the sunlight for a bit of time.

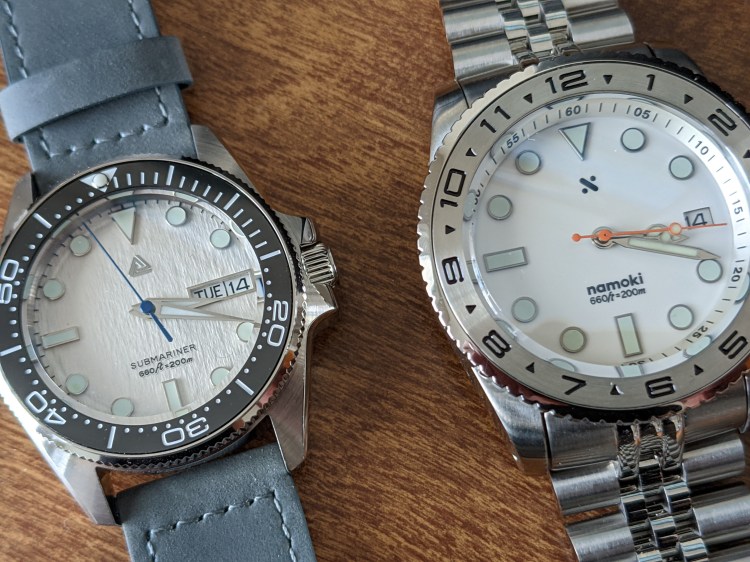
The finished watch! This one came together very well, and I am very happy with it. The second time was smoother than the first and I am very pleased with the final look of this piece.
I can certainly see it getting quite a healthy amount of wrist time. The 38mm size is quite comfortable and the strap is great.
So of course, I’m already planning my next build, but this time I’m going to base it off a Swiss ETA movement which is quite a bit more accurate (and expensive) than the NH36 movements I’ve been using here. I’m looking forward to that as an ETA based watch uses differing parts than the NH36 and I’ll have a watch that has the same movement as ones that you’d buy for several thousand dollars for significantly less.
This is Mr. After This Row, signing off.
Until next time!
Very interesting and informative on your step by step guidance on doing this build. Very intricate work that would require lots of patience. Nice looking watch!