
When I’m getting ready in the morning, the first and most important decision of my day is what watch I’m going to wear.
I got my love of watches from my father whose collection of watches I would play with when I was younger. His Rolex GMT Master always caught my eye, especially its sweeping seconds hand that was so much smoother than the “tick-tick-tick” of the cheap Timex I wore as a child.
As I got older, I read more about watches, the differences in the types of movements that drove them, their history, and the art of watchmaking.
The intricacy of a mechanical watch fascinates me. Intellectually I know that a cellphone or smart watch will keep much more accurate time, but the precision, complexity and history of the mechanical watch brings emotion to a tool that keeps time.
As my collection grew, I became interested in the process of building a watch and thought it would be cool to wear a watch that I had put together myself.
Thus began my research into the building of a watch and my dive into the world of Seiko modding. I own several Seiko watches, excellent timepieces produced in Japan with in-house movements that are far more reasonably priced than equivalent Swiss counterparts.
It turns out that the Seiko SKX007 is one of the most popular watches to mod and create something new. The SKX became popular due to it’s impressive stats as a mechanical dive watch and its low price. So popular in fact, that there are several websites dedicated to selling parts specifically for the watch. Unfortunately, the SKX was discontinued by Seiko in 2019, and the price has already crept beyond the point of being the most inexpensive option for an entry-level dive watch.
I discovered, however, that due to the rich availability of parts for the Seiko, it was possible and relatively common to effectively create a watch from scratch from the aftermarket parts on offer. This intrigued me because I wasn’t interested in modding a watch, I wanted to build one from scratch!
The Assembly
Now, I don’t have the skills or expertise to build a movement (the beating heart of a mechanical watch) but I wanted to put everything else together. So I decided to order all the parts for a watch from a website called namokiMODS based out of Singapore. They offered all the parts necessary to build a watch from its component pieces.
I’ve always been drawn to the Rolex Explorer II Polar Dial, a very clean looking watch with a striking white face and bold orange GMT hand. I decided to base my own watch on this iconic design.
The components that I purchased to make this watch were:
- The movement, in this case a Seiko NH36 automatic movement
- Case (41mm Submariner style)
- Screw down case back
- Bezel
- Bezel Insert (12 hour Stainless Steel)
- Crown and crown stem
- Chapter ring (White with minute indications)
- White enamel watch Dial
- Mercedes watch hands with orange second hand
- Double domed sapphire crystal
- Jubilee style watch bracelet
I also had to order in some watch making tools to be able to properly put everything together.
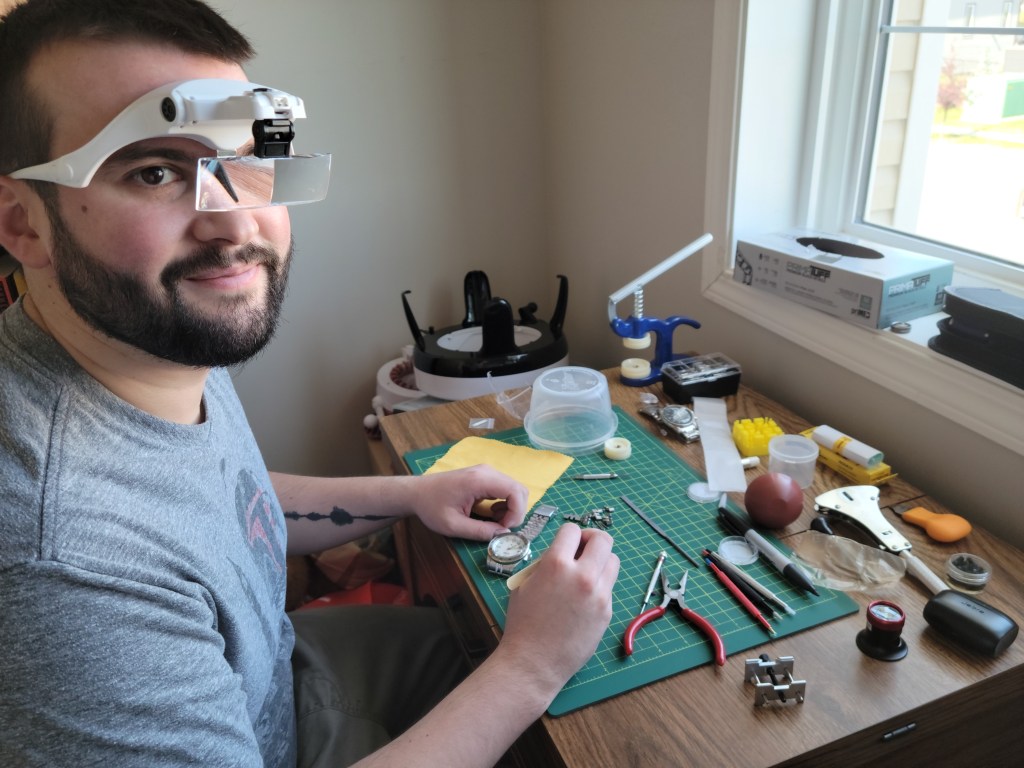
Once everything came in, I was ready to push forward and build my first watch!

The first step was to get everything out and ensure all components were accounted for and clean. I took some Rodico cleaning putty to the dial and case components to clean them before getting to work. It is also important to wear gloves as the oils from skin can cause damage to the pieces.
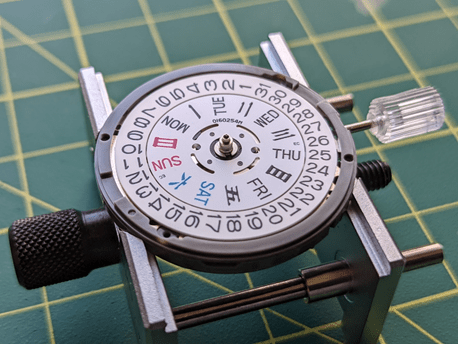
Now that everything was ready, I first placed the NH36 movement onto the movement holder. The movement comes with a temporary crown and stem so that you can check that the date and day complications function as intended. With that checked and the movement secured it was time to move to the dial.

The dial has a date window and is a flat enamel white with lumed indices. To connect to the dial, you must attach it to the movement with little feet that push into holes on the movement.
This dial had 4 feet on it to allow it to attach to a few different types of movements. To fit it on the NH36, two of the feet had to be removed. I carefully test fit the dial onto the movement to figure out which feet needed to be removed and then removed them by using pliers to gently rock them back and forth. I then took a file to clean up the tiny bumps of metal that remained.
With that done, the dial pressed on to the movement quite securely and it was time for the hands. The first step is to put the crown of the movement into the hacking position. This allows you to set the time and, in this movement, stops the second hand from moving. To ensure the hands are aligned properly and act as one would expect a watch to act you have to first adjust the crown slowly until the date changes to signify midnight. Luckily the NH36 movement starts to show a date change at around 11:30 so you just move the crown very very slowly until the date changes.
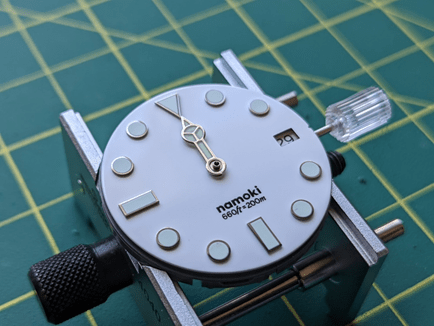
Once that occurs, you now know you are at midnight and that you can place the hour hand directly pointing to twelve. The hour hand was by far the easiest hand to set. I picked up the hour hand with my tweezers and placed it on the setting and pressed down with my hand press.
The hour hand secure, I rotated the crown to check the alignment and make sure there was enough clearance between the dial and the hand. The minute hand was a bit more difficult than the hour hand and I wasn’t having luck with the tweezers. I had read and seen in multiple videos that Rodico putty was useful to pick up the hand and align it to the post. I tried that and it worked very well, and I was able to get the minute hand on.
Unfortunately, I ran into my first spot of trouble when I rolled over to midnight, as my minute hand was about 15 minutes off. I tried nudging the minute hand with the hand presser to realign it but was unable to get it any less than five minutes off. I decided to remove the hands and try again.
This time, I got the hour and minutes hands on much quicker and much better aligned. It is still not perfect, the date rolls over at around 11:58, but I can live with being off by two minutes.
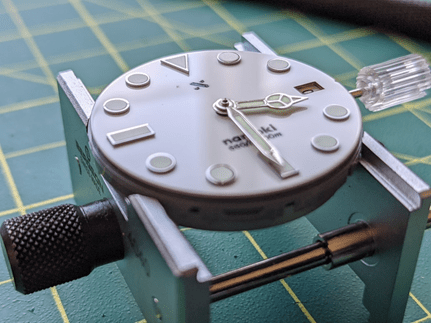
It was time for the second hand. Everything I had read said that the second hand was the most challenging part of building a watch and I whole heartedly agree.
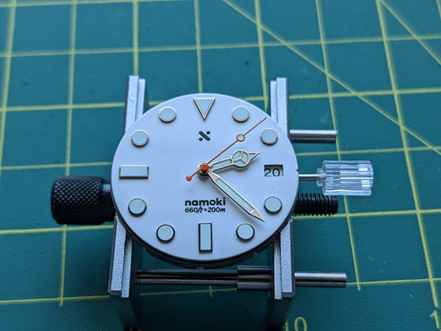
It is hard to tell from the pictures, but the tiny size of the seconds hand makes it extraordinarily challenging and fiddly to work with. I used the Rodico putty again, and while looking at the watch at eye-level I placed the hand and quickly set it with the hand press. The minute and hour hand went on in about 10 minutes, while the second hand alone took me 20 minutes to place correctly, but the satisfaction of seeing it tick away was immense.

Now that the movement and dial were ready to go, it was time to turn my attention to the case and get it ready to house the movement.
First, I cleaned up the case, both inside and out to get it ready. You want to make sure that there is as little dirt or dust as possible as once it is sealed up, it will be very difficult to get back in there to clean it. Nothing is worse than a mote of dust on the underside of the crystal.
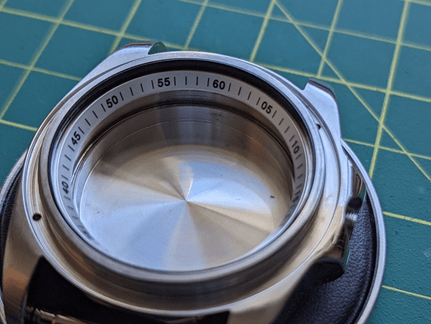
Now that it was all clean, I dropped in the Chapter ring. This sits between the dial and crystal and has a little foot that slots into the case ensuring proper alignment.
Next in is the crystal gasket, this keeps the crystal in place and is what makes the watch water resistant. I put some silicone grease on gasket before pushing it into place just above the Chapter ring.
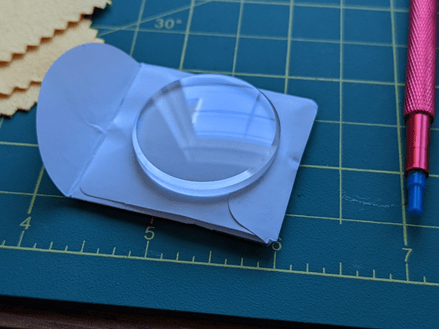
My next task was thoroughly cleaning the crystal. This one is a double-domed sapphire crystal with blue anti-reflective coating. Sapphire is the most-used watch crystal for higher-end time pieces, as with a hardness rating of 9 on the Mohs scale, it’s very difficult to scratch; only diamond is tougher!
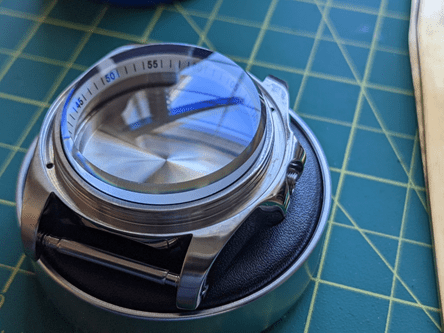
I loosely fit the crystal in the case, then used the crystal press to seat the crystal properly. I had to redo this as the first time I set the crystal, the gasket popped out of place. Luckily, after popping the crystal out and resetting the gasket the second time it popped in without issue.
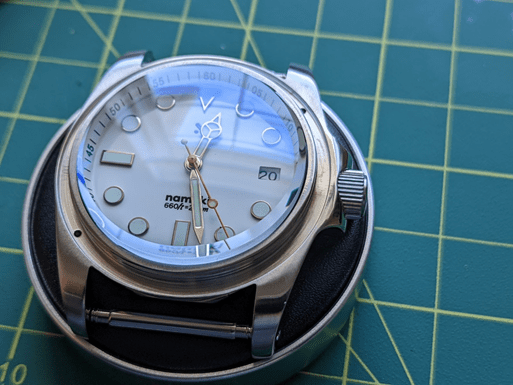
The watch was now ready to have the movement put into place.
I put the dial face up on my watch holder and lowered the case on top of it. I then flipped it around and gently pushed the movement down to get seated. With the movement and dial in the case itself you could really see it start to take shape and look like a watch.

I put the crown and crown stem into the watch through the case. As you can see, you stem is far to long for the case and that is on purpose. The stems come long as different cases require different lengths for the crown to properly screw down. You are expected to cut down the stem to the proper length.
I used some digital calipers to measure about how much stem I needed to trim. I highly recommend that you cut less than you measure as you can always cut more.
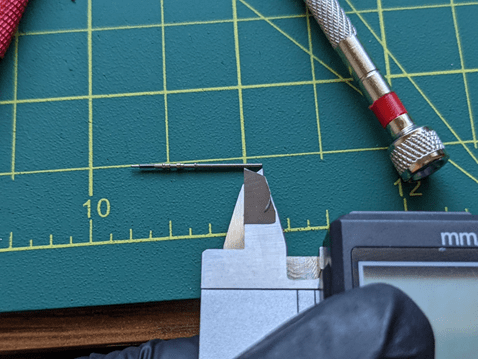
I ended up being very conservative with my first cut and ended up repeating the process of test fitting in the movement, measuring, and cutting about 3 times before I got the proper length. All told, I trimmed about 7 mm off the stem.

Now with the crown fitting properly and screwing down securely I checked the function again and everything worked as expected. I then took the crown and stem out of the case again and used some blue Loctite to secure the crown to the stem before placing back into the watch.
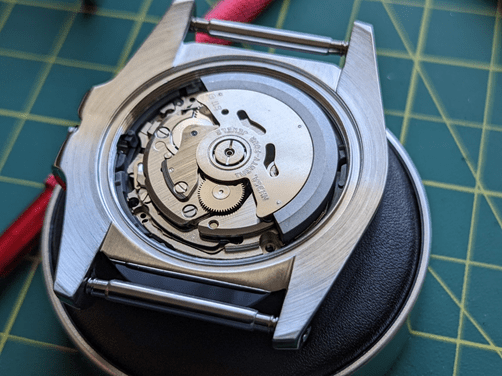
The watch was getting close to complete, and the next step was to put the case back on. I put the case back gasket in the back of the watch after putting a bit of silicone grease on it then hand screwed down the case back.

After I couldn’t hand tighten it anymore, I used a case back tool to tighten it fully and hopefully seal it against any water.
The next step was to get the bezel on. The bezel insert came with a double-sided 3M adhesive ring that you apply to the bezel.

I carefully applied the tape to the bezel and smoothed it down with tweezers while leaving the paper on it until I was ready to put the bezel insert in.
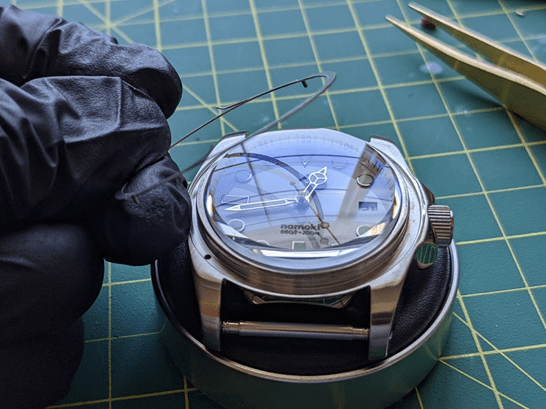
To allow the bezel to rotate with springy clicks, the click spring must be seated into the case. There are two feet on the click spring that correspond with two holes on the case that the spring slots right into.
With the click spring down, I put the bezel on top of that ready to get pressed down. Theoretically, you could press the bezel down with your hands, but the crystal press makes this much easier.
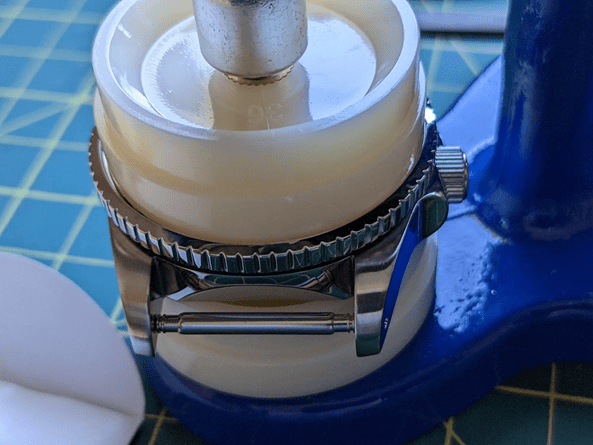
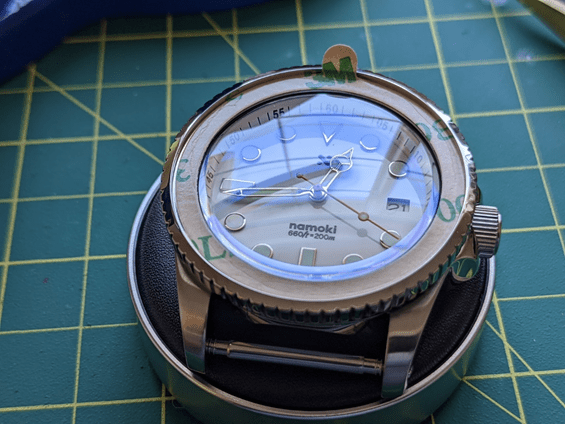
I swapped out the press die for one that fit inside the bezel and put it on the press and pressed down clicking it into place. Once that was done came the final step, where I removed the paper from the adhesive on the bezel and dropped the bezel insert into place, being careful to align the 12 with the 12 o’clock indices on the dial.
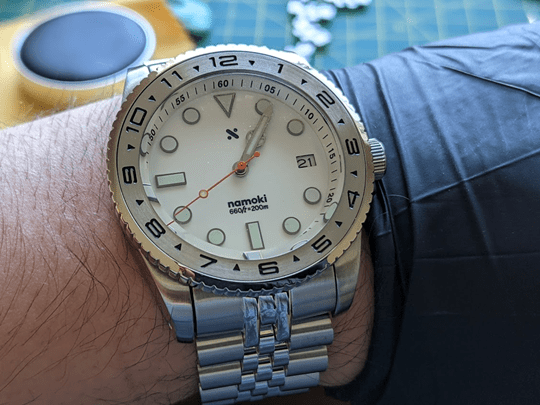
And here is the completed watch, it looks quite good if I do say so myself! Overall, I am very happy with the design of it, and it went together much better than I expected. It took about three hours to fully put together and I’m already planning my next build.
While I didn’t run into any major issues, some lessons learned from putting this together is to really slow down and carefully examine everything you are doing. The hands and setting the crystal benefit from slow steady progress.
The satisfaction and enjoyment from wearing a watch that you built yourself cannot be overstated. It is very cool to be able to look at my wrist and say I put that together and I have a far better understanding of how a watch works.
If you have any interest in watches at all I highly encourage putting one together yourself, it’s a fairly simple process but one that I had a lot of fun with.
Wow…super impressive! That would be a great way to while away time and would be incredibly interesting but you would have to have the patience to do it for sure! Great article! Love it!